


Primary Controls
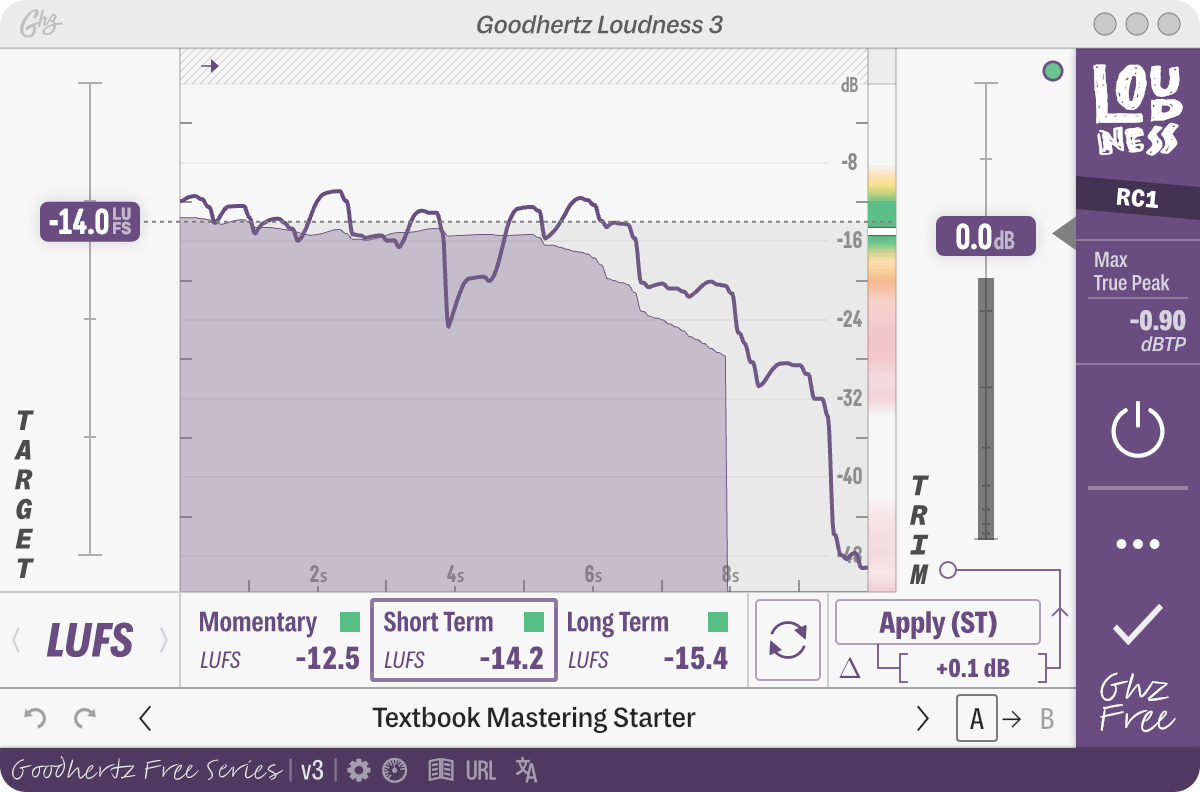
Target Loudness
Target LUFS
Adjusts the desired loudness target.
Target LUFS is only used when Meter Type is set to LUFS.
Target RMS
Adjusts the desired RMS target.
Target RMS is only used when Meter Type is set to RMS.
Target Peak
Adjusts the desired peak target.
Target Peak is only used when Meter Type is set to Peak.
Target True Peak
Adjusts the desired true peak target.
Target True Peak is only used when Meter Type is set to True Peak.
Trim Gain
Adjusts the gain of the signal.
The light indicator turns red when clipping has occured according to the long term true peak value.
Trim Gain has a triangular indicator ◀ floating to the right side of the slider. This triangle indicates approximately where Trim Gain would need to be set in order to reach the target loudness.
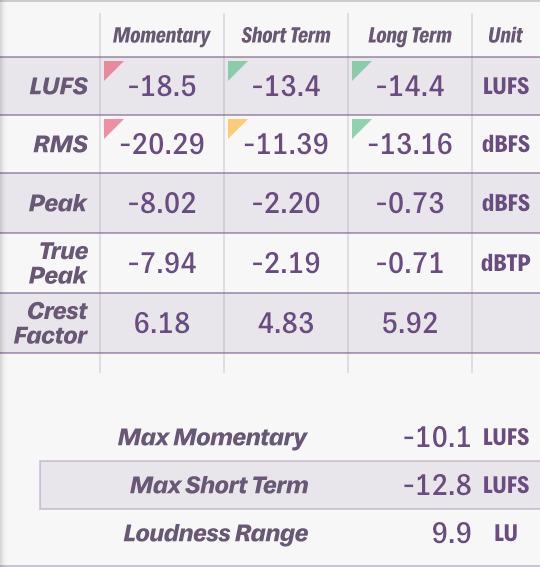
Loudness Meters
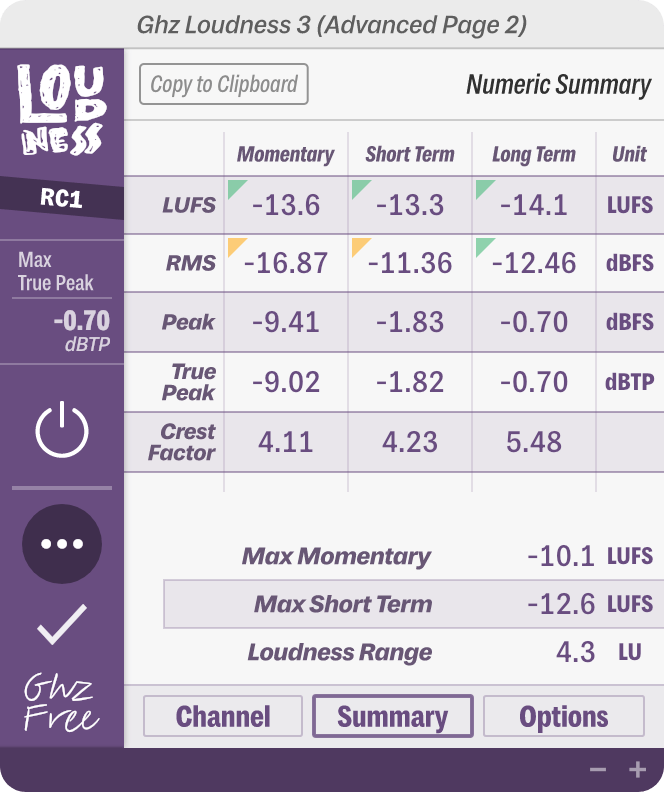
Measurement Window
Selects the measurement window of the gain to apply.
| Option | Discussion |
|---|---|
| Momentary | Represents a 150ms window in Peak/True Peak meters, a 300ms window in RMS, and a 400ms window in LUFS. |
| Short Term | Represents a 1s window in Peak/True Peak meters and a 3s window in LUFS/RMS meters. |
| Long Term | Represents the integrated value for LUFS/RMS meters and the maximum value for Peak/True Peak meters. |
Reset Meters
Resets the meter processing. This resets all the metering values across the plugin including the clipping light.
Apply Momentary
Applies the suggested momentary trim gain to reach the target loudness.
Apply Momentary is only used when Measurement Window is set to Momentary.
Apply Short Term
Applies the suggested short term trim gain to reach the target loudness.
Apply Short Term is only used when Measurement Window is set to Short Term.
Apply Long Term
Applies the suggested long term trim gain to reach the target loudness.
Apply Long Term is only used when Measurement Window is set to Long Term.